
Mood Boards for Fashion Photography


It is highly significant in today’s constantly changing sphere of fashion photography to be able to convey compelling stories through visuals. Within the incredible number of tools that photographers have at their disposal, mood boards can be considered as one of the most effective and powerful elements to conceptualize shoots and establish the desired mood that the photographer wants to create. In this article, the process of constructing mood boards for fashion photography is discussed; the sequence of steps, starting with the collection of ideas and inspiration to curating images, colours, and textures.
What is a Mood Board?
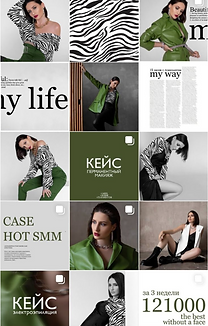
It is a visual tool that enables one to space out images, hues, backgrounds and other things in order to establish the tone of the theme being worked on. It is used as a guide of the creativity you have in mind which gives a picture of the tone, subject, and style you wish to set in your fashion photography shoot.


The Step-by-Step Guide to Creating a Mood Board
Step 1: Gathering Inspiration
The first step while creating a mood board is to collect inspiration. This can come from various sources:
Fashion Magazines and Editorials:
Browse through fashion magazines and editorials to see how professionals convey different moods and styles. Pay attention to color schemes, lighting, poses, and overall aesthetics.
Online Platforms:
Various platforms like Pinterest, Instagram, Canva are the gold mines of inspiration. Create boards or collections to save images that resonate with your vision.
Art and Nature:
Don’t limit your inspiration to fashion photography. Art galleries, nature, architecture, and everyday life can also provide unexpected and unique ideas as well as inspiration.
Personal Experiences:
Draw from your own experiences, memories, and emotions. Personal stories can add a layer of authenticity and also deep meaning to your mood board.

Step 2: Defining Your Vision
When you have accumulated enough inspiration to complete the task finally, it is time for you to decide on the vision that you are providing for the work. Ask yourself the following questions:
-
What story do I want to tell?
-
What emotions do I want to evoke?
-
Who is my audience?
Answering these questions will help you narrow down your ideas and also establish a clear direction and path for your mood board.
Step 3: Curating Images
With a defined vision, start curating images that align with your concept. It is advisable to get a set which is united in terms of the overall mood, style and concept you want to set in your room.
Selecting Images
Choose images that:
-
Resonate with your vision: It should also be noted that each image in the work should serve the narrative that is being set out to viewers.
-
Represent different elements: Add some photos like people, places, abstractions, and colors.
-
Inspire creativity: Also opt for images that spark new ideas and keep your creativity flowing.
Organizing Images
Organize all your images in a way that makes you feel it tells a story. You can arrange them chronologically or based on the flow of your shoot. The goal is to create a narrative that guides the viewer through your vision.


Step 4: Incorporating Colours and Textures
Textures and colours are extremely important components when it comes to creating an atmosphere and emphasizing the narrating part of the mood board.
Choosing a Color Palette:
Choose a colour theme or palette that aligns with your vision. Use tools like Adobe Colour to create complementing colour schemes. Consider the impact of colours and how they contribute to the overall mood and vibe.
Adding Textures:
Textures add depth and dimension to your mood board. Include elements like fabric swatches, patterns, and surface textures that complement your images and color palette.
Step 5: Creating the Mood Board
Now it is time to recall all the conclusions. You can create your mood board using various tools:
Digital Tools
-
Adobe Spark: An easy, very handy application for creating great mood boards.
-
Canva: It has many templates and also provides customization options.
-
Pinterest: Incredibly useful for gathering and storing inspos in one location.
-
Physical Mood Boards:
If you like something more tangible, make a pin-up felt board where you can glue or pin the images printed in manual magazines, fabrics samples etc. Corkboard or a large cardboard should be your base for this image.

Step 6: Sharing and Refining
Once your mood board is complete, share it with your team. Gather feedback and make necessary adjustments to ensure everyone understands and aligns with the vision.
Presenting to the Team:
Present your mood board in a way that clearly communicates your vision. Explain the story, mood, and concepts behind each element.
Refining Your Mood Board:
You should always be open to feedback and should be willing to make adjustments as needed. Refining your mood board ensures that it remains a relevant and accurate representation of your vision throughout the shoot.
